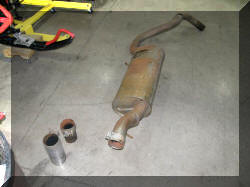
| Below is the
process I went through to install the stacks on my truck (2007 Ford,
4X4, Extended Cab, Short bed) The process should be pretty much the
same for any truck. There will be some differences between makes
and body lengths (Crew cab, long bed Etc)
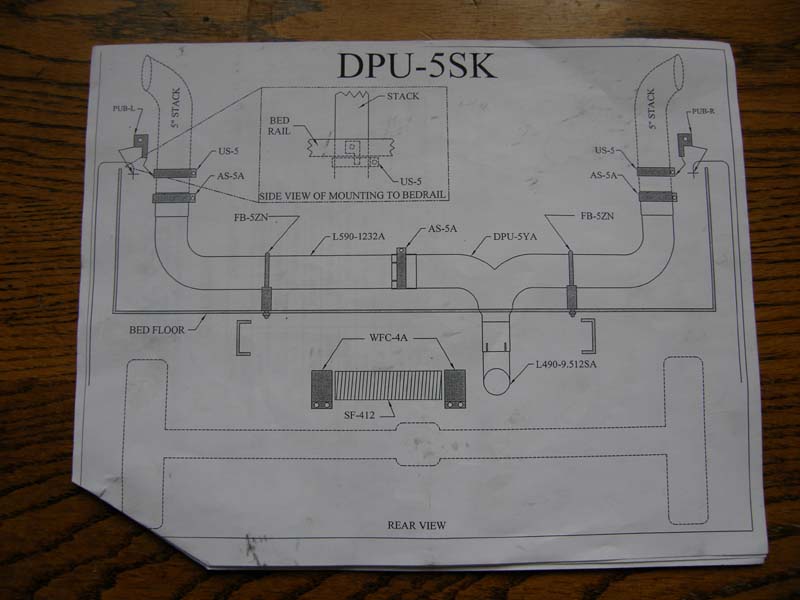
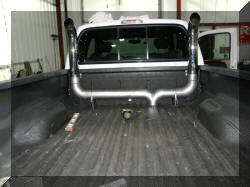
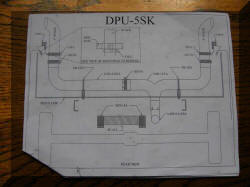
The last photo on this page is a diagram of
the exhaust system that you may find helpful.
There will be some differences between the "Kit" I got and the
"Kit" you get as I added some additional items to what comes with
the basic "Kit". Those would include the fixed length extension
pipe, the internal mufflers, the long length of flex I purchased
from the Beam Mack dealer, and the box to cover the
"Y" tube in the bed .
I had two goals: one was looks and the
second was to keep if quiet. The first was (in my opinion) a huge
success. The second still needs some work. More on that later.
The first thing I did was lay out all the parts, identify what each
of the parts were and how they went together |
 |
I purchased my "Kit" form Parleys Diesel
Performance.Com. I dealt with Daniel who was very helpful and put
up with all my questions. Their phone number is 1 801 938 4891 and
their web site address is
http://www.parleysdieselperformance.com
The "Kit" is drop shipped from the vendors,
the exhaust came from Grand Rock
http://www.grpipes.com , and the "Y" tube cover box came from
MBRP. |
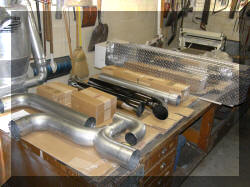 |
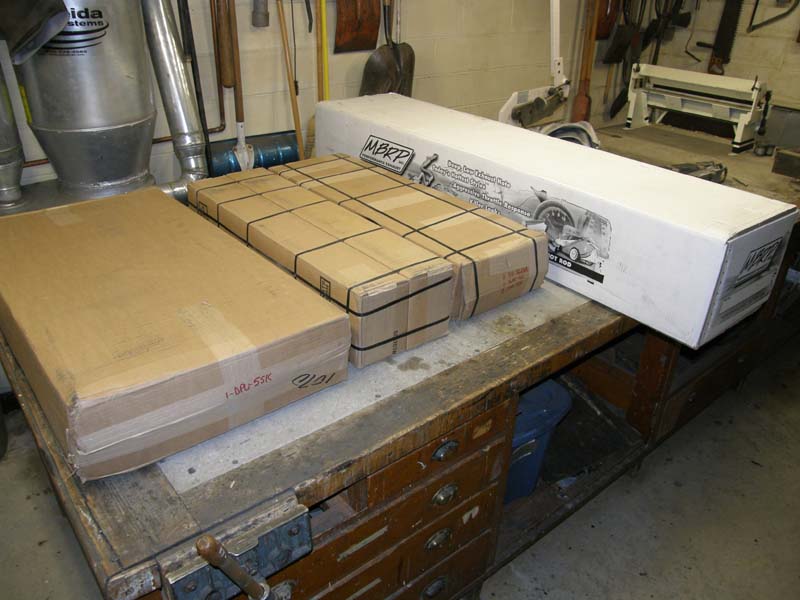
Some of the boxes unpacked. |
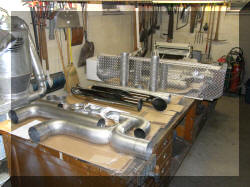 |
All the boxes unpacked. There was no damage to
any parts, all parts were well packed. |
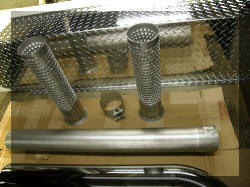 |
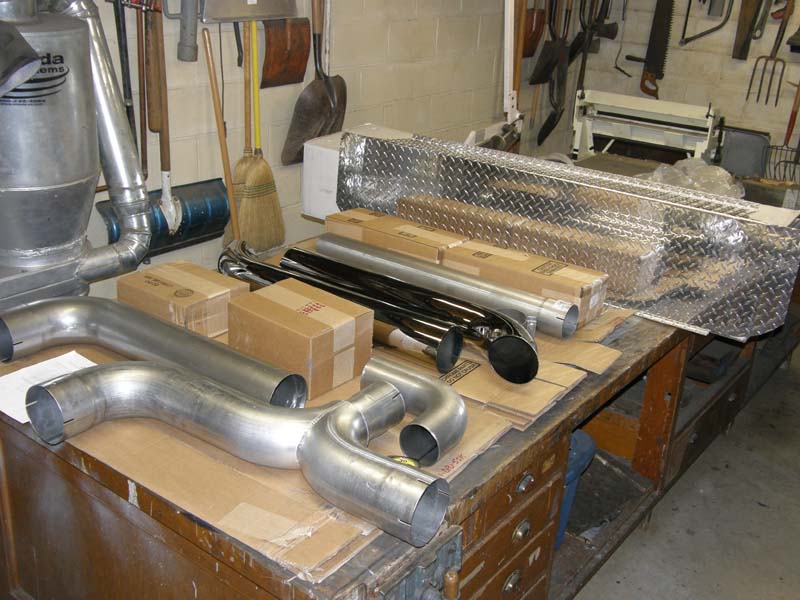
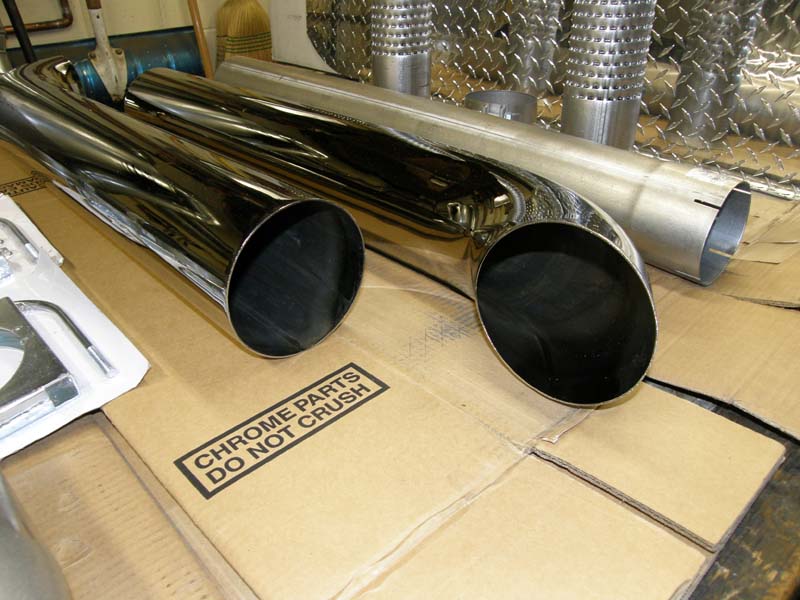
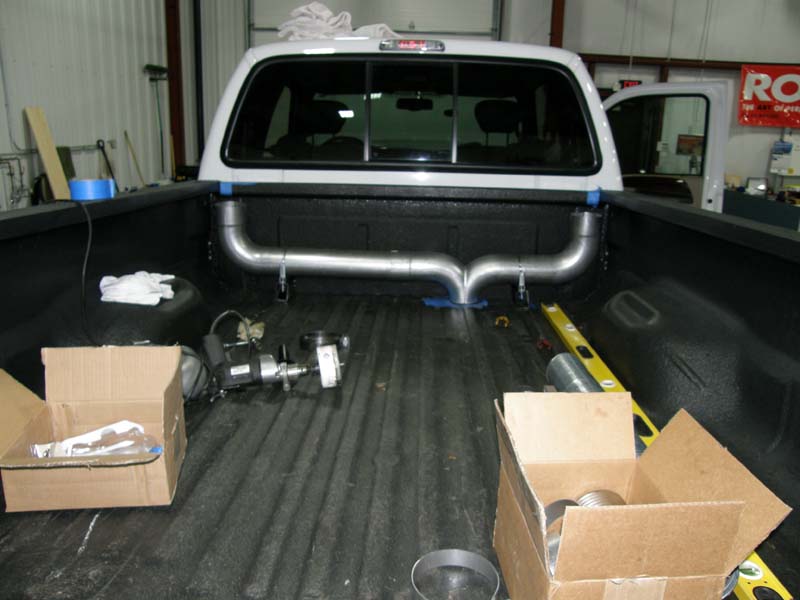
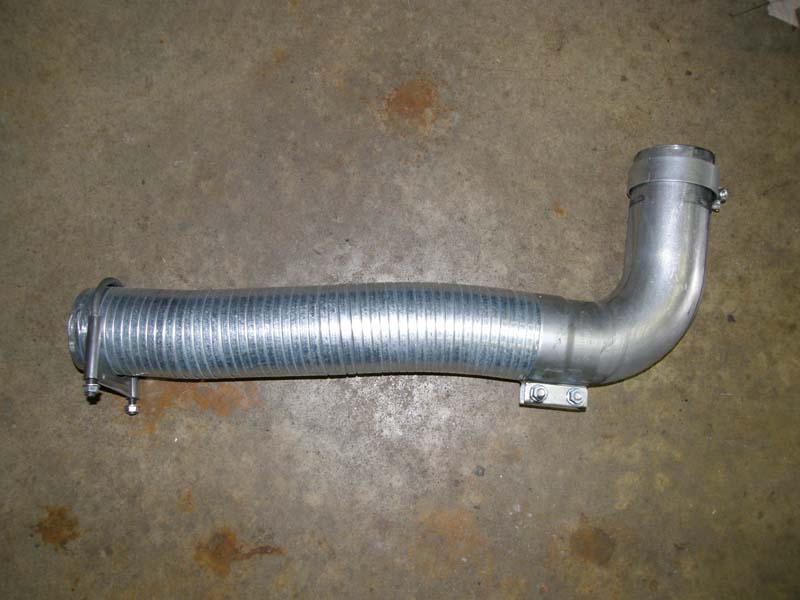
Additional parts I ordered. The "Y" tube cover
plate for the bed, the internal mufflers for the stacks and the
extension tube to make up the difference in the length of the truck
as I have the extended cab. |
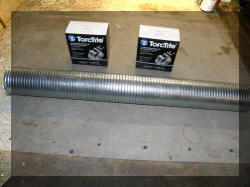 |
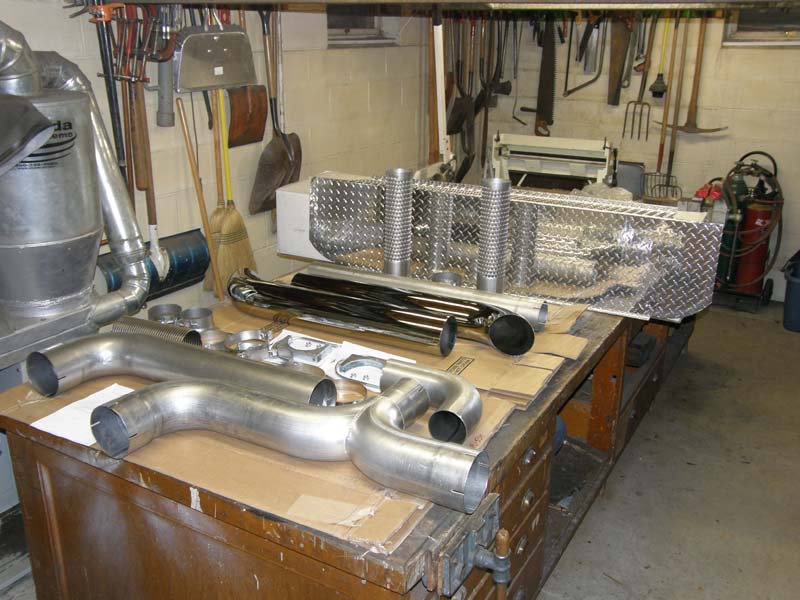
I also purchased from the local Beam Mack
dealer a 36 inch length of flex pipe. My reasoning for this was to
eliminate an additional connection between the extension pipe and
the supplied flex pipe (in the "Kit"). Turns out I made use of the
extension pipe, more on that later. |
 |
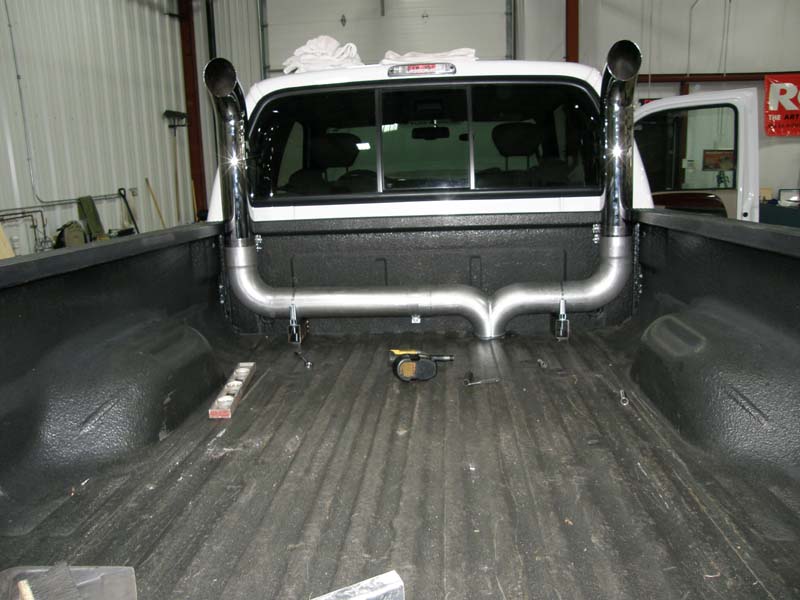
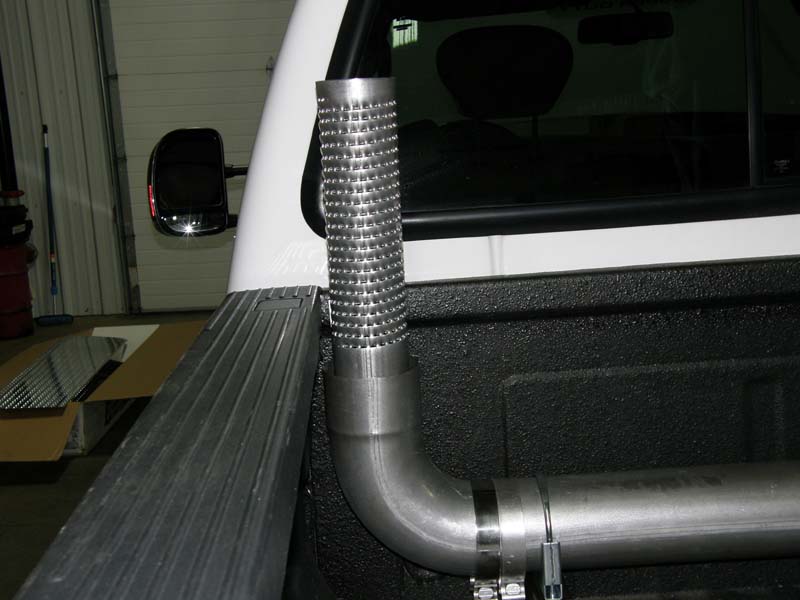
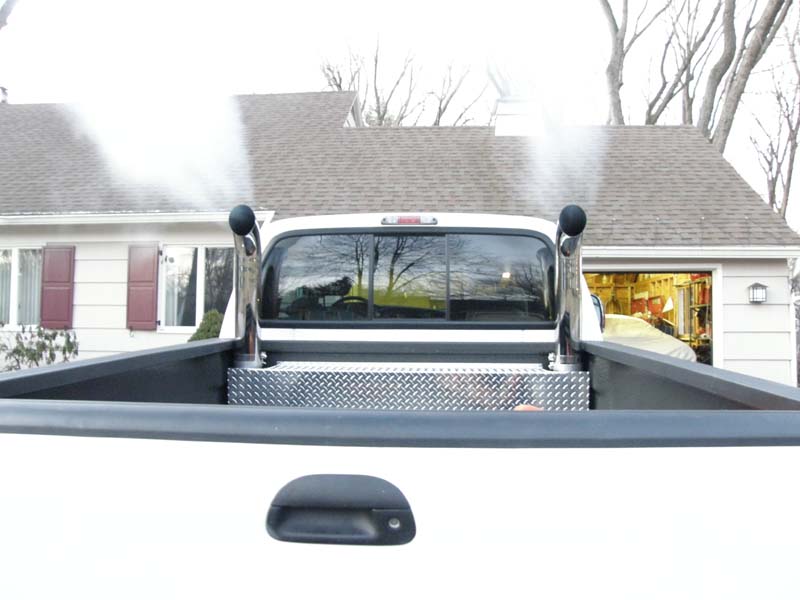
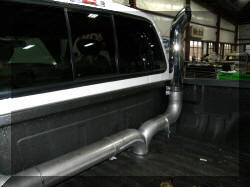
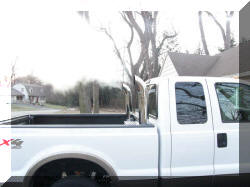
Mandatory picture of the stacks |
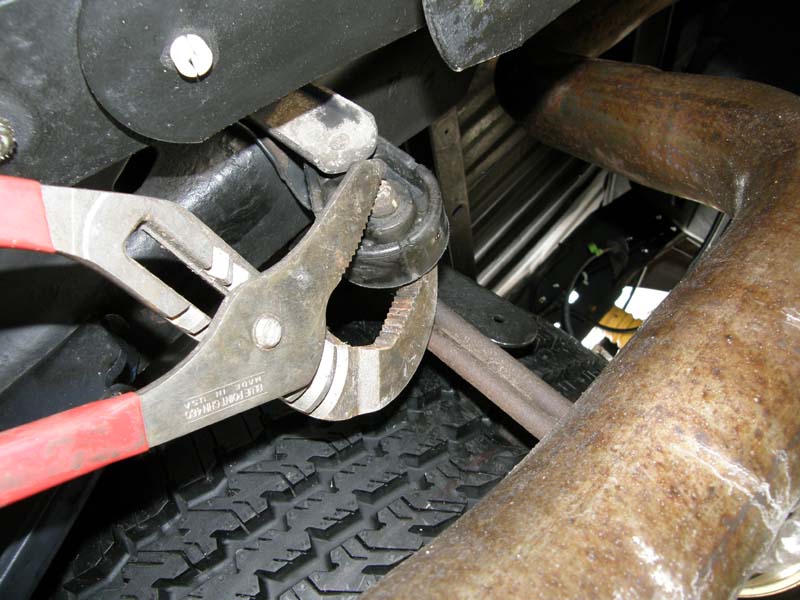
1)
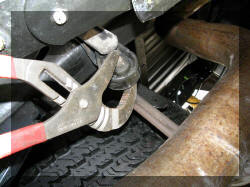
"The first step is to remove the exhaust from the back of the
cab all the way to the back of the truck. "
This was quite easy and the whole thing can come down in one piece.
I did jack the back of the truck up so the tail pipe extension would
come over the top of the rear axle. If you do not have a 4X4, this
may be more of a problem.
The hardest part is getting the hangers out of the rubber shock
blocks, First spray the end of the hanger stinking out of the rubber
block with silicone lubricant (don't use oil as it will attach the
rubber).
Then, I found that if you take a large pair of channel locks, put
one jaw on the back side of the rubber block and the other jaw right
on the metal hanger you can squeeze the hanger almost all the way
out of the rubber block |
 |
 |
 |
 |
 |
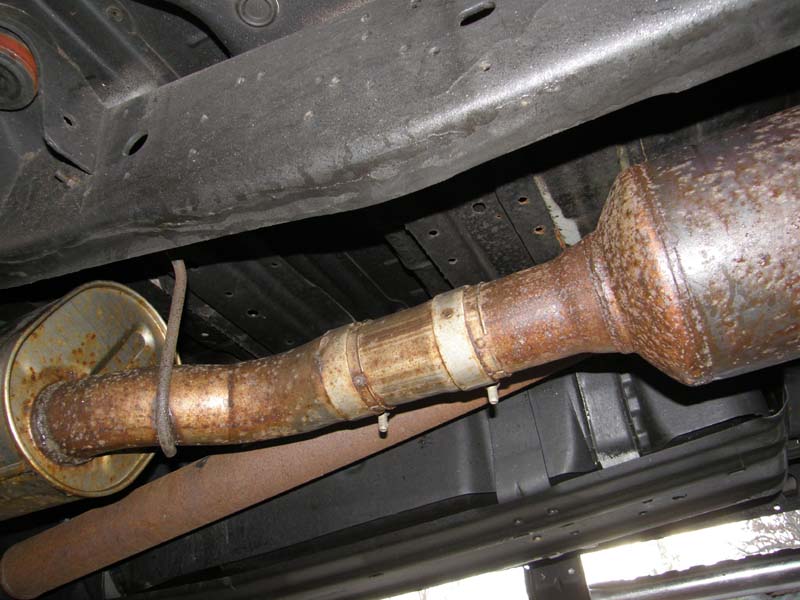
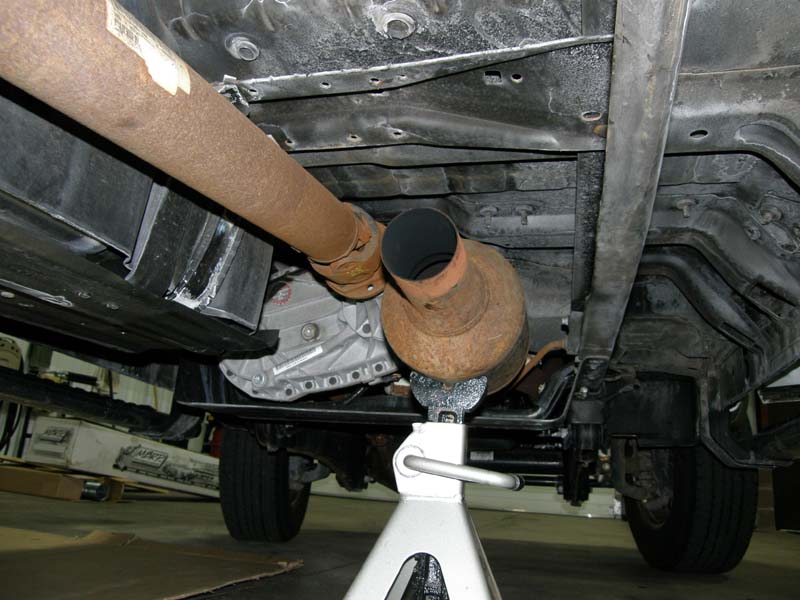
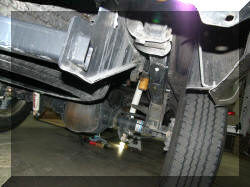
Support the back of your catalytic converter
so it does not hang off the down tube from the engine. |
| 2)
The supplied instructions tell you to remove the heat shield from
under the bottom of the truck (if equipped). I did have a heat
shield but it was not in the way of anything so I left it inplace. |
 |
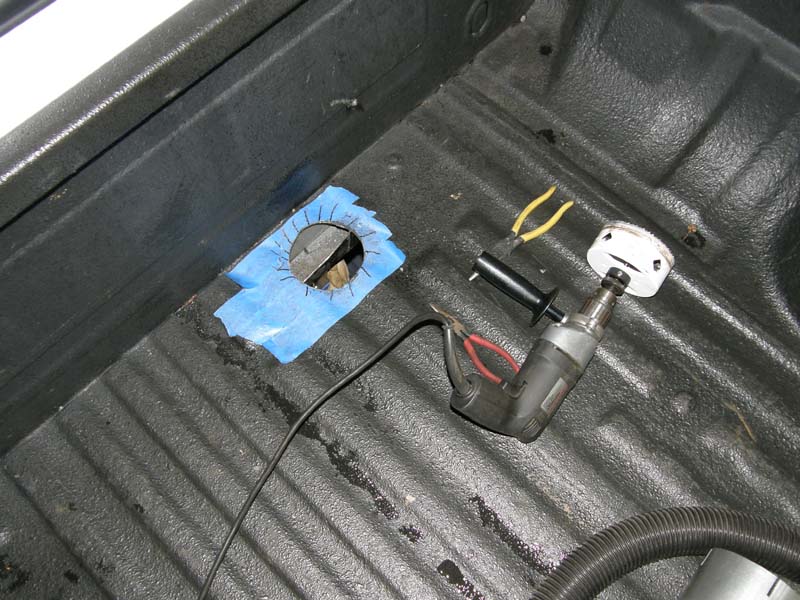
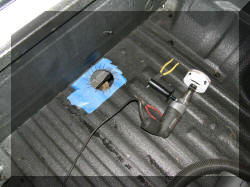
3) This is the start of
the most traumatic part of the it install. "Put the long elbow into
the "Y" pipe. Place them together into the bed to determine where
the hole will go (yes, you have to drill a large hole in your bed).
A small piece of the long elbow may have to be trimmed to fit your
bed depending on the make of your truck." Mine could have been an
inch longer and needed no trimming.
MEASURE TWICE AND CUT ONCE! Take your time here!!!!!!
|
| 4)
"Figure where you want the kit located. I wanted my stacks to be
located right in the corners of the bed of the truck. This meant I
had to locate the "Y" pipe as far forward as possible in the bed,
although you have to allow for the top lip of the bed so it will not
be right up against the front of the bed. CONFIRM your hole location
from the underside and topside BEFORE DRILLING".
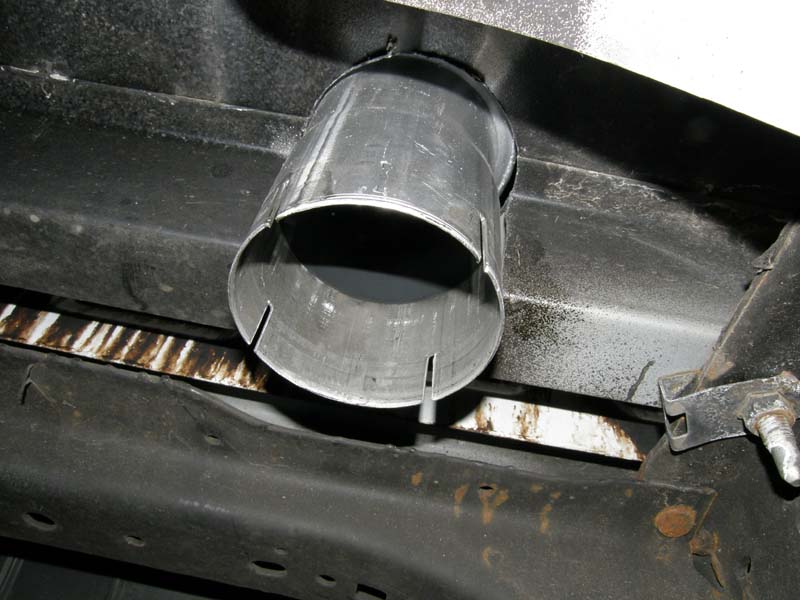
In my case that meant that I had to cut part
of the front cross member of the bed. I believe this is ok for
several reasons. The part that had to be cut is the upright part of
the "U" channel of the cross member. The whole front of the bed is
also part of the structure of the bed and is in the same plane as
the upright of the "U" channel of the cross member. 6 to 8 inches on
either side of this hole the cross member sits on the frame of the
truck. In addition you will no longer be able to put weight in this
section of the bed as the space is taken up by the exhaust system.
It is my opinion that this will not cause a problem. |
 |
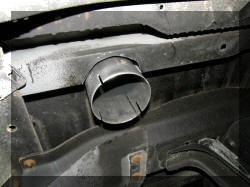
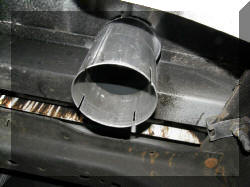
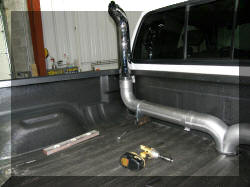
5) "After the hole is
drilled through the bed floor (there is no going back now!), place
the "Y" pipe through the hole, place the stacks into the ends of the
elbows." The hole can be created in a
number of ways. I when to Home Depot and purchased a Hole saw. If
you do this keep the speed of the saw down or you will ruin the saw.
A cut off wheel will work if you make pie cuts and then cut the ends.
If you look closely you can see the cross
member I had to cut in the hole.
|
 |
 |
 |
Note, the left pipe can fall down as the elbow
can turn in the "Y" pipe, the right stack will stay upright by
itself. ''KEEP THE PLASTIC OVER THE
CHROME, as you do not want to scratch the Chrome while you finish
the install."
|
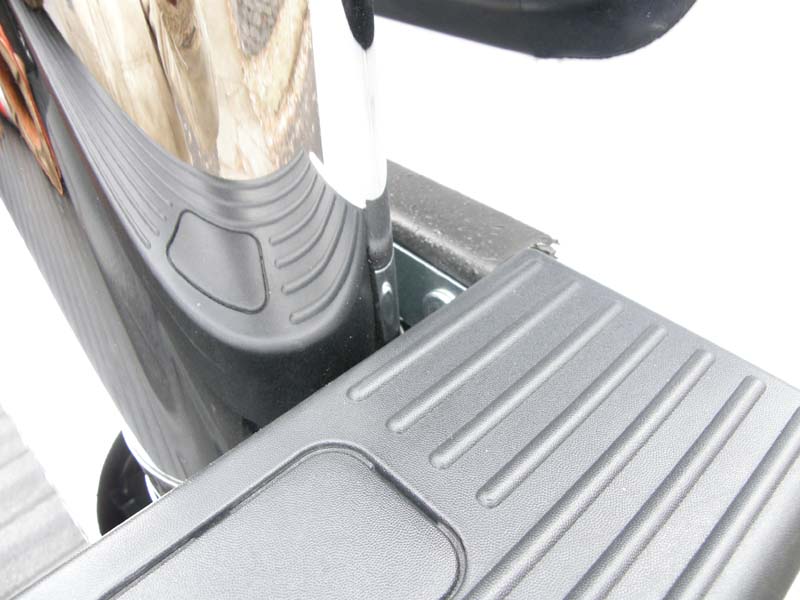
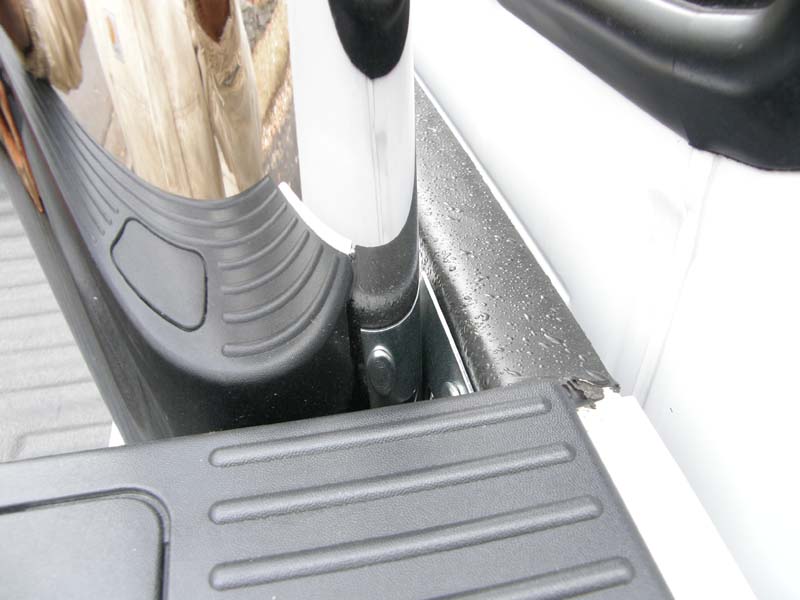
6)
The supplied instructions go like this:
"Hold the PUB-L and R up to the stack to determine hole
locations through the inside lip of the truck bed. The left and
right can be swapped for better and easier mounting. These
mount to the sides of the front of the bed. "
First off, I found these instructions a little confusing. What they
are talking about is the "L" shaped brackets that support the
bottoms of the stacks. I do not have a good picture of this. I got a
little ahead of myself here. I also found that I could not mount the
brackets to the side of my bed as the stake pockets are doubled
walled on my truck and I would not have been able to get to the back
side of the bolt to hold the nut in place to tighten it. I had to
mount the brackets to the front lip of the bed.
7) "Drill the holes through the bed lip and
loosely bolt the brackets to the bed."
See the pictures below. I will update these later with better
pictures.8)
"Slide the bright Accuseal Clamps over the stack and capture the
brackets with them. You can flip the clamp either way to hide the
bolt area." |
 |
 |
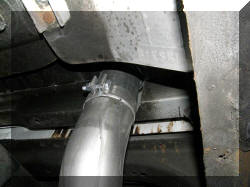
| 9)
"Slip the short 90 Degree elbow into the opening of the "Y"
(underneath). Put the flex assembly over the elbow about 2 to 2 1/2
inches." |
 |
 |
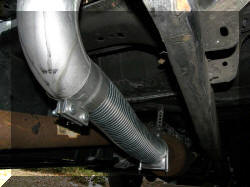
| I deviated a
little from the directions here. I purchased a long length of flex
from the Mack Dealer and used that rather then the short length
provided in the kit. I did this so that I would not have a second
connection in this pipe as I needed the extension pipe also, as I
have the extended cab truck. NOTE:
The ends of the flex pipe are very sharp. Be careful! |
 |
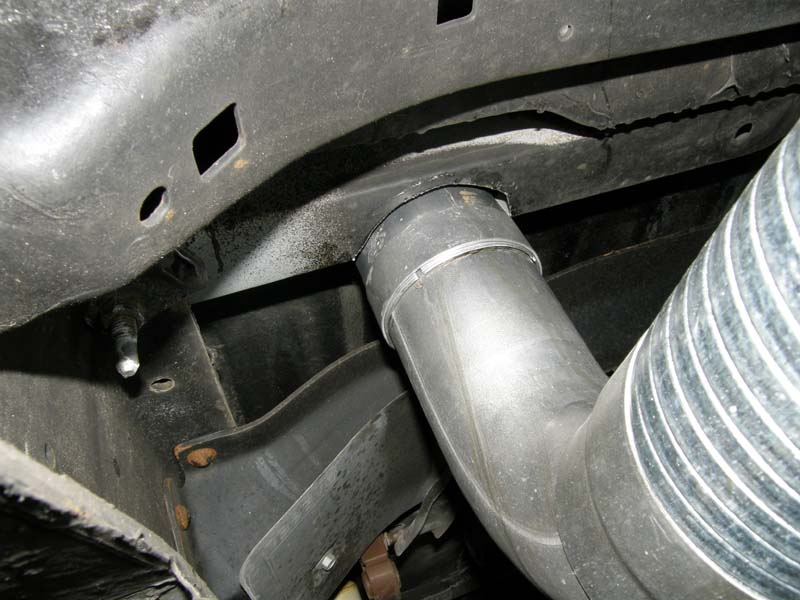
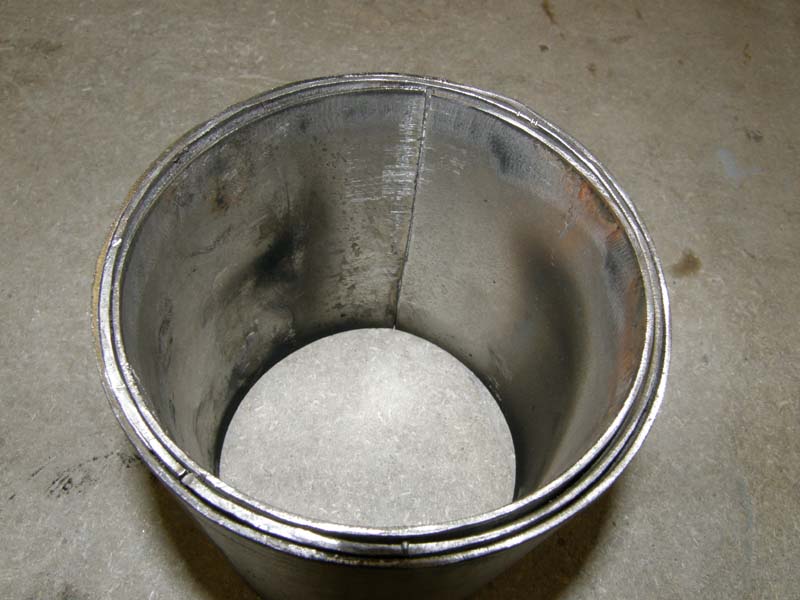
 |
| 10)
Instruction number 10 did not apply to me as I have an extended cab
truck. It went as follows. "Measure the length from 2 1/2 inches
into the flex forward, to go over your existing pipe that will
probably need to be cut. If you have a 3 or 3 1/2 inch diameter
exhaust pipe, reducers are available."
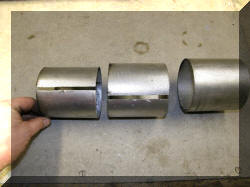
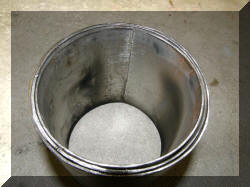
I did not order the reducer, and should have.
It took me a 1/2 hour to make this, if you need one buy it. I made
my own by cutting three 4 inch lengths of the extension tube,
splitting them down the middle, inserting them inside themselves,
until I had the right dimensions. Each split down the middle was
progressively smaller so that I had a tight fit. |
 |
 |
 |
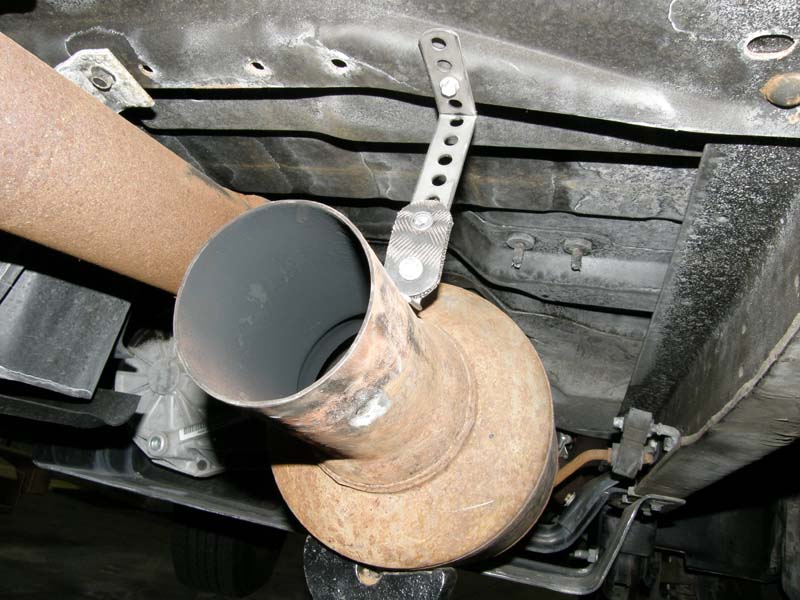
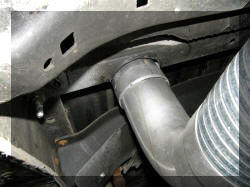
Not in the instructions. I elected to support
the back side of the catalytic converter. I purchased a standard
universal pipe hanger and attached it to a cross member that was
just in the right spot. it worked out for me. I think it makes a
stronger system and did not take much time. I would recommend it if
you are keep the catalytic converter. |
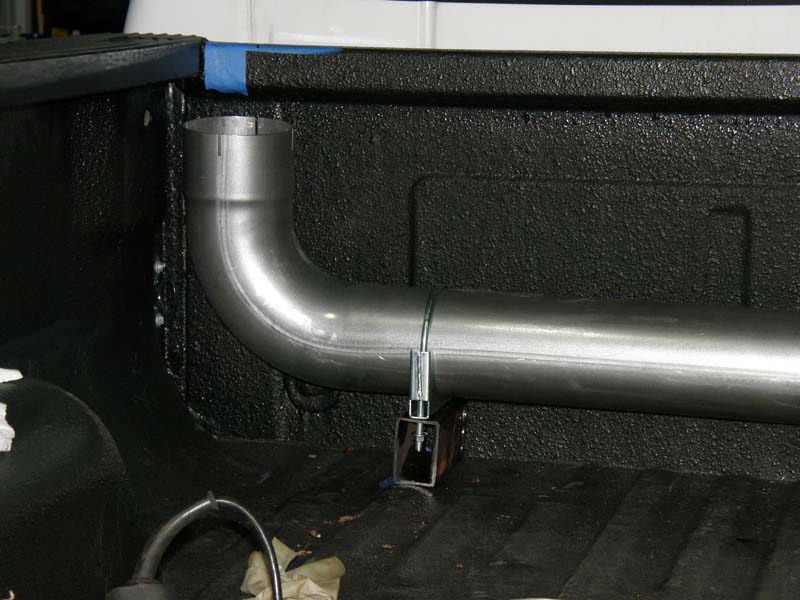
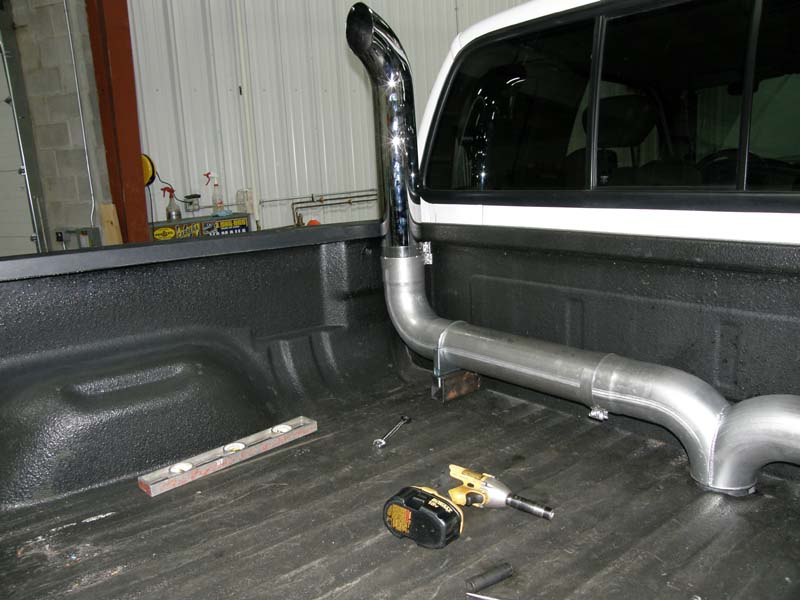
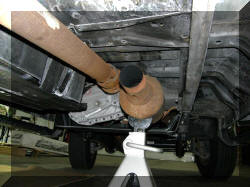
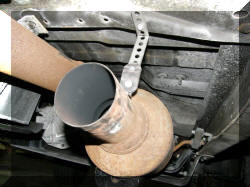
| 11)
This was another instruction that I found confusing. It went like
this. "At this point you can measure and figure where the center
clamp should go through the floor of the bed. This clamp should bolt
the "Y" pipe to the long left side elbow AND to the floor of the
bed." What they are saying is to now
use the band clamp to clamp the "Y" pipe and left side elbow together. I would leave them a little loose. The clamps that go to the
bed of the truck I found needed to be spaced up from the floor of
the bed of the truck. I found that 2 X 3 square steel tube worked
perfect. I bolted the clamp, pipe, and tube together, located the
assembly in the bed of the truck. Drilled some holes from underneath
the truck and through-bolted the tube to the truck |
 |
 |
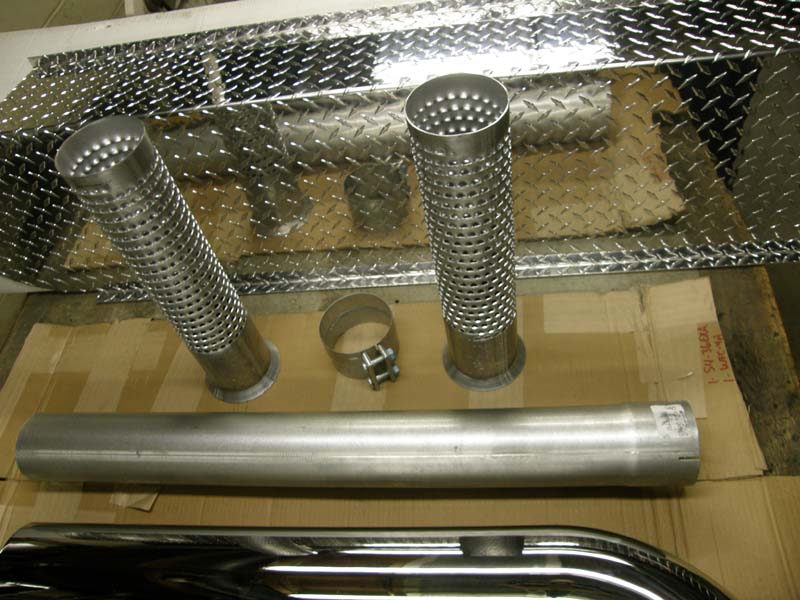
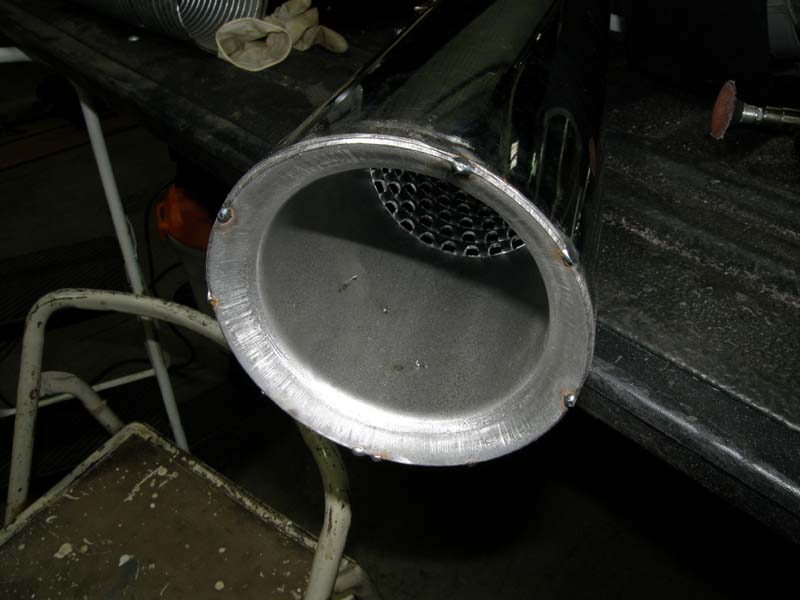
| I had ordered the
internal mufflers as I wanted a quiet system. They are supposed to
be installed by placing them into the upright of the "Y" tube and
tapping into place by placing a block of wood over the top and using
a mallet tapping into place. The stack then fits over the top to
hold them in place. I found that they still rattled a little so I
then tack welded the internal muffler to the end of the stack and
then ground the weld smooth. As this end sits down into the "Y" tube
you can not see it and makes for a stronger connection. |
 |
 |
| 12)
"Snug up all clamps. etc. Make sure nothing is bound, rubbing, or
touching anything that it shouldn't"
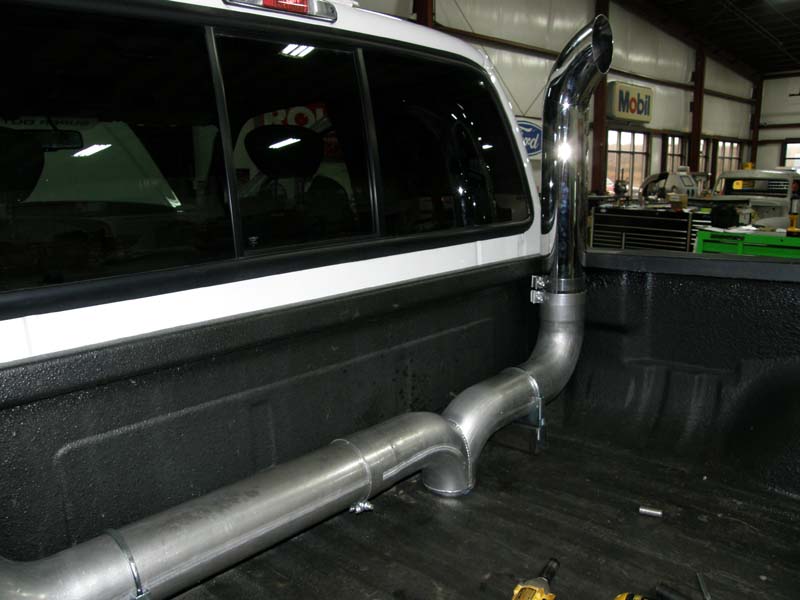
Now is the time to take time to get everything straight. There is
nothing worse then a stack that is not straight up and down, and not
parallel to the other stack. I found by tacking a piece of wood and
putting over the mouths of the stacks I could line everything up and
get them straight. A couple of guys on either side and one in the
back while you make these adjustment really helps. |
 |
 |
| NOW DO YOU HAVE
EVERYTHING STRAIGHT?
13) "Tighten everything". 14)
"BEFORE starting the engine,
make sure the chrome is CLEAN; grease and oil free. A
hand fingerprint will "BAKE" into the finish if not clean. Start the
engine and check for leaks, etc. Retighten accordingly. Take for a
test drive and recheck."
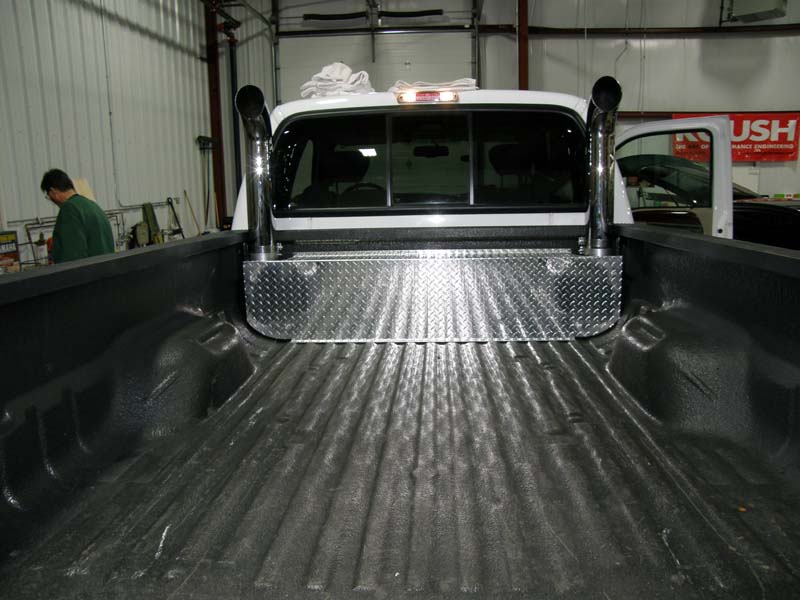
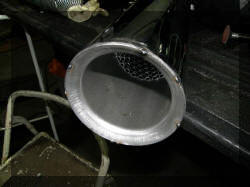
I purchased a "Y" pipe cover and I think it
really cleans up the install |
|
|
 |
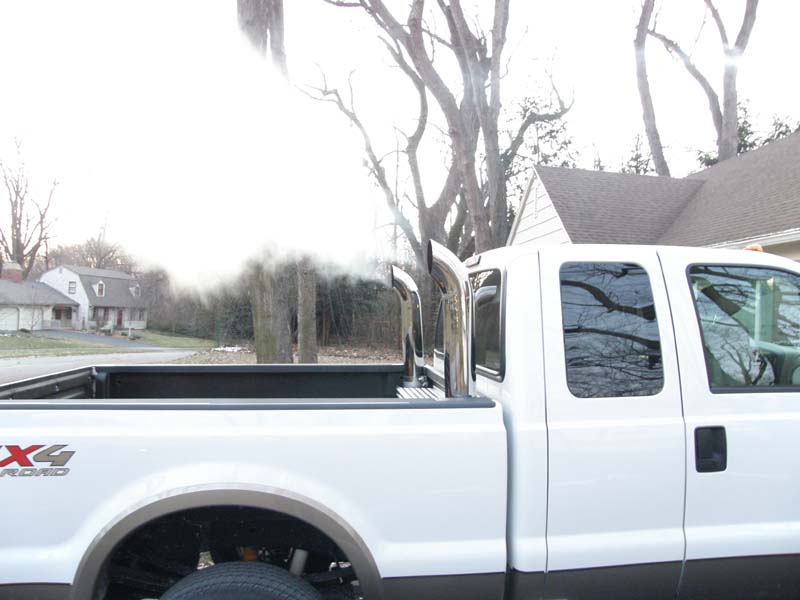
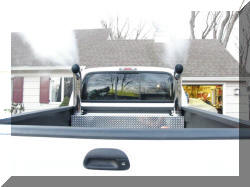
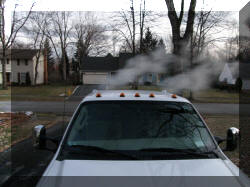
| 15 ) ENJOY!
It was cold this morning so I took a couple of shots of the
vapor trails. |
 |
 |
 |
 |
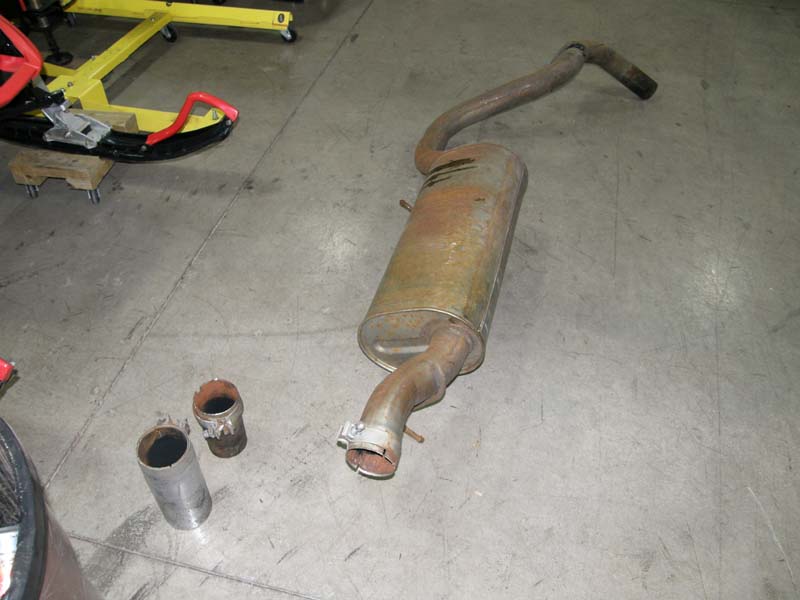
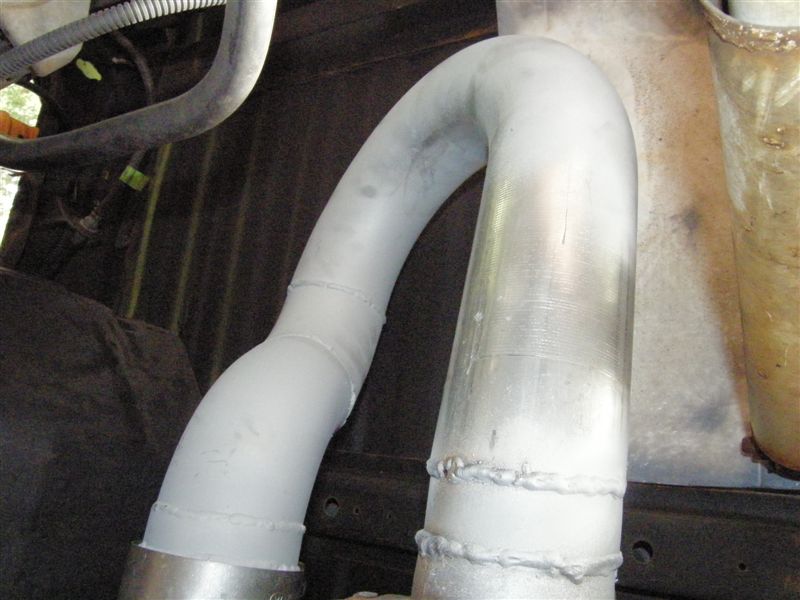
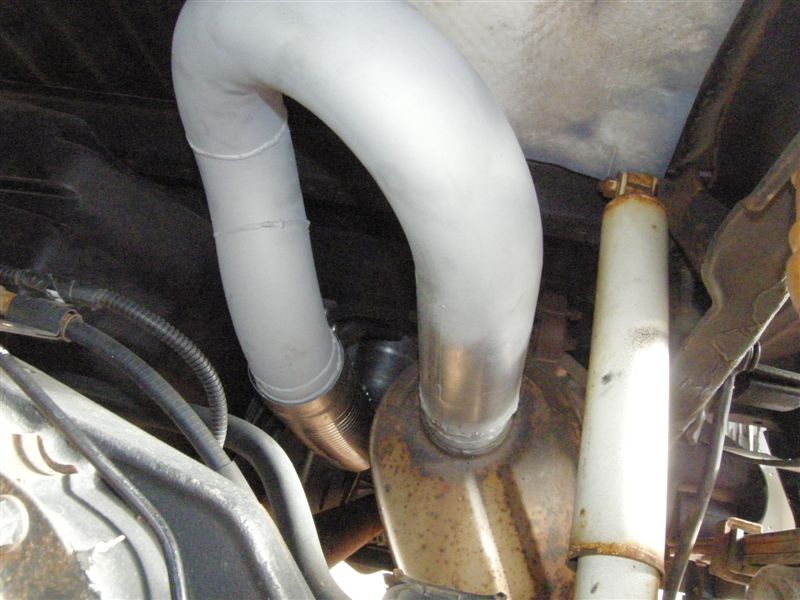
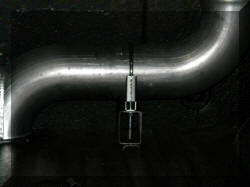
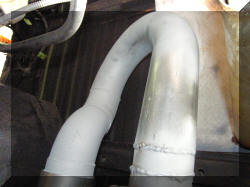
| Ok, at this point
the installation is complete per the instructions. The pipes were
louder then what I wanted as I use the truck to haul an enclosed car
carrier. I wanted a quite exhaust system. So.... what I did was to
cut the "Y" pipe and move it over six inches so that the inlet was
between the driveshaft and the stock muffler. I then purchased
through Hearththorb Exhaust
http://www.heartthrobexhaustinc.com/
two 180 degree Mandrel bent four inch exhaust bends (1/2 in
larger then the stock 3 1/2 inch system). Those bends were cut up
and welded back together to route the exhaust from the exit of the
stock muffler to the stacks. Important, you must have a piece of
flex pipe between this set up and the stacks as the muffler want to
be able to move when the engine moves.
It is also very important that you have no
"Kinks" in you bends, they need to be smooth. The result was the
sound level was the same as the stock system which is what I was
after. |
 |
 |